You have probably spend times waiting to restore packages for your Node projects during your build process, especially in larger projects. But how can you make it faster and more efficient? Let’s explore the pipeline caching functionality from Azure DevOps.
Pipeline caching functionality helps reduce the build time by downloading the dependencies from one run, later to be reused in later runs, making it more efficient and reduce the build time.
Let’s move on to the tutorial.
Prerequisites
Before moving to the tutorial, if you want to follow along, make sure that you have the following available in place:
- A Azure DevOps account
- A code editor like Visual Studio (VSCode)
- Yarn as your package manager
While NPM is also the package manager to manage packages for your node projects, this tutorial will use yarn as the preferred way. You can also use NPM if that’s your preference.
Setting up the project structure
Let’s start by creating some dependencies inside the package.json of your project.
Assuming that you already have a repository available, you will see that this tutorial is using yarn-pipeline-caching as repository. Let’s continue.
- Open up the package.json in your editor
- For demonstration purposes, add the following dependencies inside the file. You’ll be seeing the result later of caching later when installing the dependencies
{
  "dependencies": {
    "@zkochan/cmd-shim": "^3.1.0",
    "babel-runtime": "^6.26.0",
    "bytes": "^3.0.0",
    "camelcase": "^4.0.0",
    "chalk": "^2.1.0",
    "cli-table3": "^0.4.0",
    "commander": "^2.9.0",
    "death": "^1.0.0",
    "debug": "^3.0.0",
    "deep-equal": "^1.0.1",
    "detect-indent": "^5.0.0",
    "dnscache": "^1.0.1",
    "glob": "^7.1.1",
    "gunzip-maybe": "^1.4.0",
    "hash-for-dep": "^1.2.3",
    "imports-loader": "^0.8.0",
    "ini": "^1.3.4",
    "inquirer": "^6.2.0",
    "invariant": "^2.2.0",
    "is-builtin-module": "^2.0.0",
    "is-ci": "^1.0.10",
    "is-webpack-bundle": "^1.0.0",
    "js-yaml": "^3.13.1",
    "leven": "^2.0.0",
    "loud-rejection": "^1.2.0",
    "micromatch": "^2.3.11",
    "mkdirp": "^0.5.1",
    "node-emoji": "^1.6.1",
    "normalize-url": "^2.0.0",
    "npm-logical-tree": "^1.2.1",
    "object-path": "^0.11.2",
    "proper-lockfile": "^2.0.0",
    "puka": "^1.0.0",
    "read": "^1.0.7",
    "request": "^2.87.0",
    "request-capture-har": "^1.2.2",
    "rimraf": "^2.5.0",
    "semver": "^5.1.0",
    "ssri": "^5.3.0",
    "strip-ansi": "^4.0.0",
    "strip-bom": "^3.0.0",
    "tar-fs": "^1.16.0",
    "tar-stream": "^1.6.1",
    "uuid": "^3.0.1",
    "v8-compile-cache": "^2.0.0",
    "validate-npm-package-license": "^3.0.4",
    "yn": "^2.0.0"
  }
}- Install the dependencies locally once by running
yarn installin your terminal which generates the yarn.lock file. The yarn.lock file will be used to uniquely identify what needs to be cached later - Push the content to your version control, in this tutorial it will be the Azure Repos. Make sure the node_modules folder is not in version control by adding a
.gitignorefile
Now that you have the project structure created, let’s add the azure-pipelines.yml to start creating the pipeline.
Creating the pipeline
- Inside your editor, create a folder called cicd
- Add the
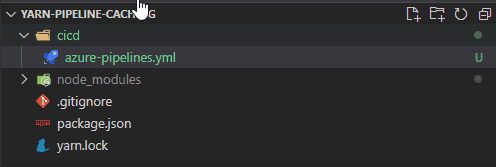
azure-pipelines.ymlfile inside the cicd folder as shown below:
- Open the pipeline file and add Cache@2 task:
variables:
  YARN_CACHE_FOLDER: $(Pipeline.Workspace)/.yarn

stages:
  - stage: Restore
    displayName: 'Install dependencies'
    jobs:
      - job:
        pool:
          vmImage: windows-latest
        steps:
          - task: Cache@2
            inputs:
              key: '"yarn" | "$(Agent.OS)" | yarn.lock'
              restoreKeys: |
                yarn | "$(Agent.OS)"
                yarn
              path: $(YARN_CACHE_FOLDER)
You’ve probably noticed that there are three parts given in the key, a static string (yarn), the unique operating system to run the job, and the hash file yarn.lock that identifies the dependencies in the cache
- Next, add the
yarn --frozen-lockfileas a script task to make dependencies reproducible:
- script: |
    yarn --frozen-lockfile
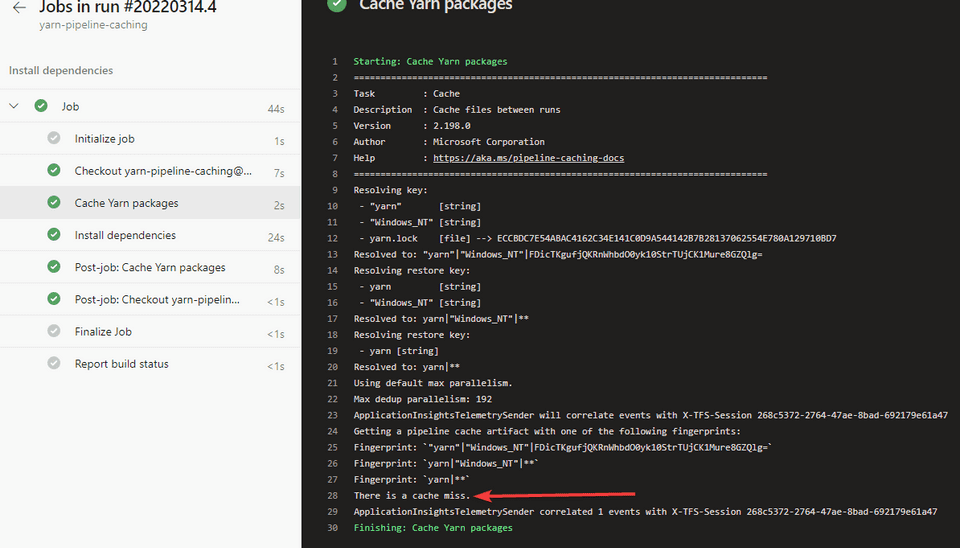
displayName: 'Install dependencies'- Commit the changes to version control and run your pipeline once to see the result of the first run:
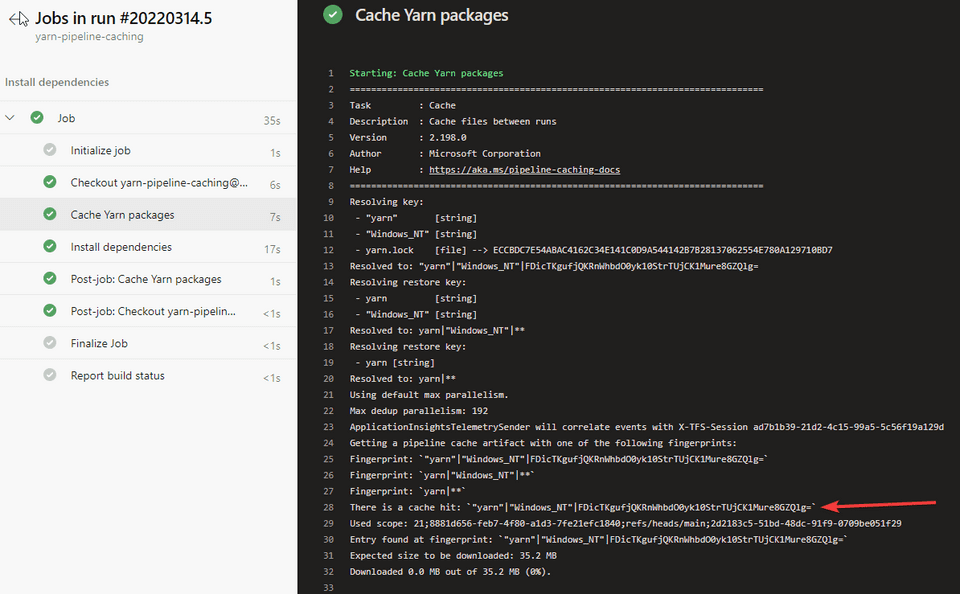
- Now, run the pipeline once more:
Conclusion
You’ve seen that there is an improved in build time, and that cache is being build successfully now during each run making dependencies reproducible. Depending on your Node projects, the time will even decrease more, making your pipelines run faster!
Now that you are armed with “cache”, why not start by adding the task to your relevant projects.
References
Most of the code about the Pipeline caching was taken with love from the Microsoft documentation.


