In this blog, you are going to build upon the basis from the first part of this series. The only pre-requisites that you need for this tutorial, is that you’ve followed along with the first part. So when you are ready, let’s dive right into it.
Adding custom task
In the first part of the tutorial, you’ve mainly focussed on the New-AzRoleAssignment and Remove-AzRoleAssignment cmdlet. Now you are going to look by adding an optional task to run with the Invoke-Expression cmdlet. While the Invoke-Expression can happily run any code that you pass, it can be used maliciously as it construct itself during runtime. For this, you are going to look how to reduce the security risk while running the pipeline. Nevertheless, let’s get going by adding the task to the templates repository.
- Open your templates repository in your code editor
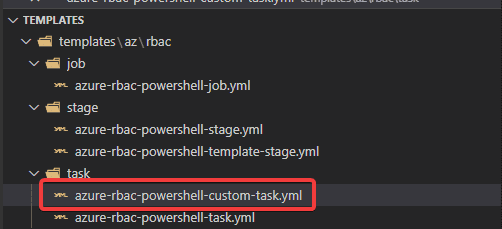
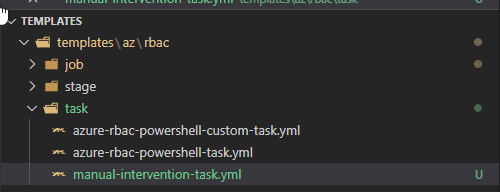
- Under the task folder, add the following file azure-rbac-powershell-custom-task.yml
- Add the following code which builds up of four parameters
parameters:
- name: environmentName
  type: string
- name: command
  type: string
- name: parameters
  type: string
- name: azureSubscription
  type: string


steps:
  - task: AzurePowershell@5
    displayName: 'Azure role assigner - custom'
    inputs:
      azureSubscription: "${{ parameters.azureSubscription }}-${{ parameters.environmentName }}"
      azurePowerShellVersion: 'LatestVersion'
      ScriptType: 'InlineScript'
      Inline: |
        $Command = "${{ parameters.command }}"
        $Params = "${{ parameters.parameters }}"
        Write-Output "Running command: $Command $Params"
        try {
          Invoke-Expression "$Command $Params" -ErrorAction Stop
        } catch {
          Throw "An error occurred while executing: $($_.Exception.Message)"
        }
Let’s go through it a bit what the task does:
- environmentName: just like in the first part, you can fill in a parameter to target the environment accordingly
- command: the command that you want to run, let’s say you want to run the
New-AzTagcmdlet - parameters: the parameters to pass to the command, for example to the
New-AzTagyou can add the-Nameand-Valueparameters - azureSubscription: the service connection to target
Now you still want to have this flexibility to either run the normal task, or the custom task. For that, you have to make some modifications to the other templates.
- Open up the azure-rbac-powershell-job.yml file
- Change the parameters to add the newly introduced values to target the task parameters and an additional
runCustomparameter that is going to be used to evaluate the tasks to run
parameters:
- name: environmentName
  type: string
- name: roleAssigner
  type: string
  default: New
- name: objectId
  type: string
- name: scope
  type: string
- name: roleDefinitionName
  type: string
- name: azureSubscription
  type: string
- name: runCustom
  type: boolean
  default: false
- name: command
  type: string
- name: parameters
type: string- Just after the steps, add a expression to check the runCustom variable which by default is false
jobs:
  - job: Assigner_${{ parameters.environmentName }}
    displayName: 'Azure role assigner - ${{ parameters.environmentName }}'
    steps:
    - ${{ if eq(parameters.runCustom, false)}}:
      - template: ../task/azure-rbac-powershell-task.yml
        parameters:
          environmentName: ${{ parameters.environmentName }}
          roleAssigner: ${{ parameters.roleAssigner }}
          objectId: ${{ parameters.objectId }}
          scope: ${{ parameters.scope }}
          roleDefinitionName: ${{ parameters.roleDefinitionName }}
azureSubscription: ${{ parameters.azureSubscription }}- After the normal task, add the custom task with the expression that evaluates to true if specified in the parameter
- ${{ if eq(parameters.runCustom, true)}}:
  - template: ../task/azure-rbac-powershell-custom-task.yml
    parameters:
      environmentName: ${{ parameters.environmentName }}
      command: ${{ parameters.command }}
      parameters: ${{ parameters.parameters }}
      azureSubscription: ${{ parameters.azureSubscription }}
Already sweet, the job is adjusted now accordingly. The stage job parameters needs to be updated also to pass on the default parameter values.
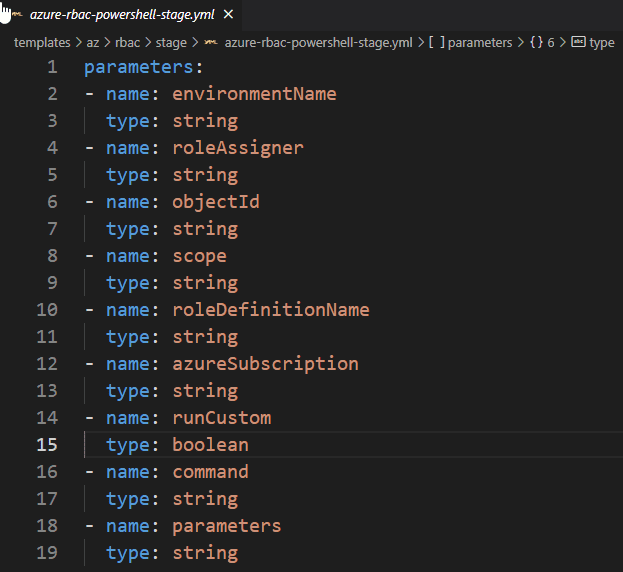
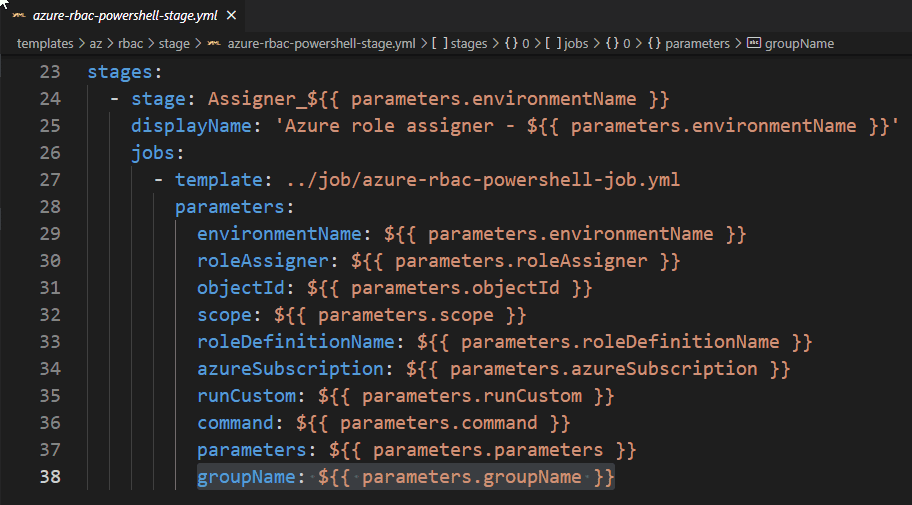
- Open the azure-rbac-powershell-stage.yml file
- Copy and paste the parameters from the job section and save it
- Add the three new introduced parameters just underneath the azureSubscription
stages:
  - stage: Assigner_${{ parameters.environmentName }}
    displayName: 'Azure role assigner - ${{ parameters.environmentName }}'
    jobs:
      - template: ../job/azure-rbac-powershell-job.yml
        parameters:
          environmentName: ${{ parameters.environmentName }}
          roleAssigner: ${{ parameters.roleAssigner }}
          objectId: ${{ parameters.objectId }}
          scope: ${{ parameters.scope }}
          roleDefinitionName: ${{ parameters.roleDefinitionName }}
          azureSubscription: ${{ parameters.azureSubscription }}
          runCustom: ${{ parameters.runCustom }}
          command: ${{ parameters.command }}
          parameters: ${{ parameters.parameters }}
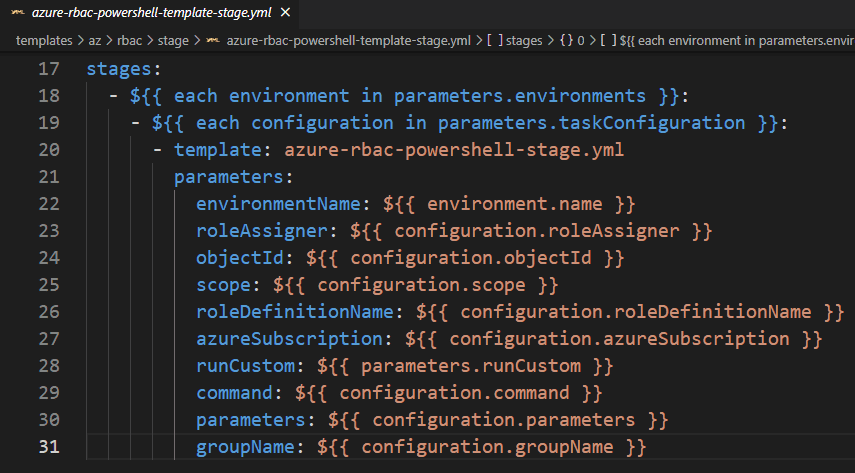
Lastly, within the template that is being used as extends, the required parameters are also needed.
- Open the azure-rbac-powershell-template-stage.yml file
- Adjust the parameters with the following code
parameters:
- name: environments
  type: object
  default:
  - name: test
  - name: qa
  - name: prod
  values:
    - test
    - qa
    - prod
- name: taskConfiguration
  type: object
- name: runCustom
  type: boolean

stages:
  - ${{ each environment in parameters.environments }}:
    - ${{ each configuration in parameters.taskConfiguration }}:
      - template: azure-rbac-powershell-stage.yml
        parameters:
          environmentName: ${{ environment.name }}
          roleAssigner: ${{ configuration.roleAssigner }}
          objectId: ${{ configuration.objectId }}
          scope: ${{ configuration.scope }}
          roleDefinitionName: ${{ configuration.roleDefinitionName }}
          azureSubscription: ${{ configuration.azureSubscription }}
          runCustom: ${{ parameters.runCustom }}
          command: ${{ configuration.command }}
          parameters: ${{ configuration.parameters }}
When you are finished with updating the files, commit back the changes to your Version Control System.
Building in traceability
In the first part, it was already stated that the traceability wasn’t fully covered yet. In this section, you are going to have a look into how this can be achieved through Azure Boards, linking up the changes to a work item, and eventually see it in the Azure Pipelines.
- Open the Azure Boards and create a task
When you are searching for a New Work Item and task is not listed, it might mean that you are using a different Process template
- Add a title for the new task, in this example it is Add new Azure tag
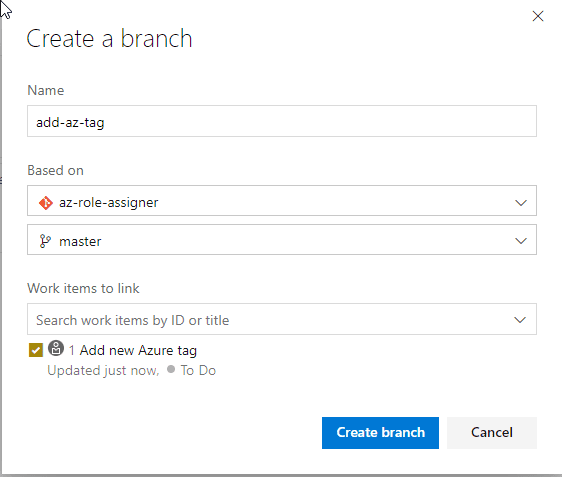
- From the task, click on the three dots and select New branch
- Name the branch, in this example it is add-az-tag and select the az-role-assigner repository to branch off from
- Go to the Azure Repos -> Select the az-role-assigner and switch to the branch
- Modify the azure-pipelines.yml to create a new Azure tag on the resource group
resources:
  repositories:
    - repository: templates
      type: git
      name: sandbox/templates
      ref: master

extends:
  template: /templates/az/rbac/stage/azure-rbac-powershell-template-stage.yml@templates
  parameters:
    environments:
      - name: test
    taskConfiguration:
      - roleAssigner: ''
        objectId: ''
        scope: ''
        roleDefinitionName: ''
        azureSubscription: azdo-sp
        command: New-AzTag
        parameters: '-ResourceId /subscriptions/<subscriptionId>/resourceGroups/rg-data-test -Tag @{tag = ''test''}'
    runCustom: true
Make sure that you modify the subscriptionId with your subscription ID
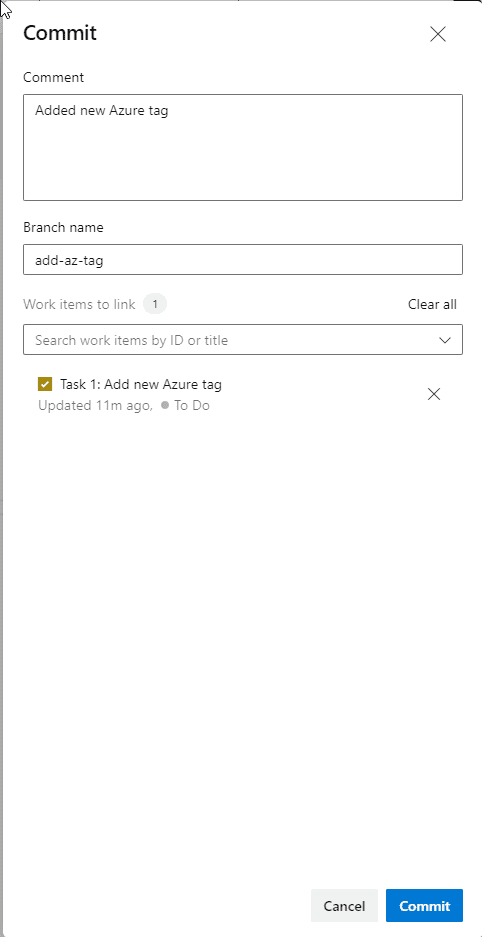
- Commit the changes and add the work item as link
- The pipeline will now be trigger and you noticed that the work item is linked
From this part, you can link everything back to your commit back to the work item that was developed back in the days. Some great traceability for auditing purposes!
During the time of writing, the deployment status reporting is not implemented for YAML pipelines
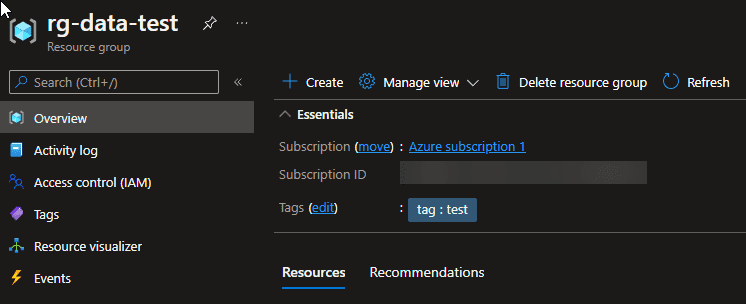
You’ll also see that the new tag is added depending on the -ResourceId you gave.
Adding intervention
Lastly, as already stated in the beginning, using the Invoke-Expression cmdlet can have malicious intents or it can be misused by granting more permissions then needed which definitely is not desired in a high secure environment. There are always a lot of possibilities available to build security around your pipeline, and in this tutorial you’ll be using the ManualValidation@0 task as a pre-step before executing the custom task. Keep in mind, users with the ‘Queue builds’ permissions do have access to Resume or Reject the run. It still keeps a record who has either resumed or rejected the run.
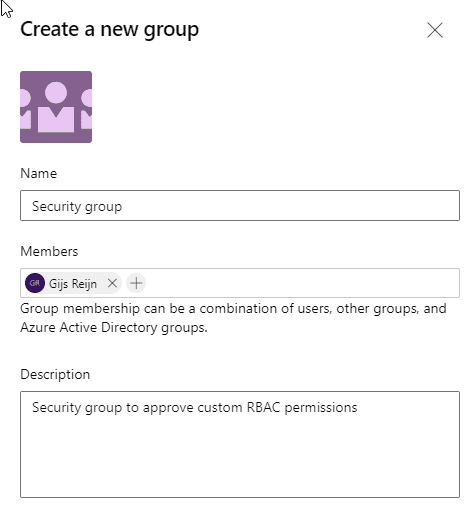
- Open the Project Settings, click Permissions and create a New Group
- Name the group, give it a description and add at least one user
- Back in your editor, make sure that you are in the templates repository
- In the task folder, create a new file called manual-intervention-task.yml
- Add the following content into the file
parameters:
  - name: command
    type: string
  - name: groupName
    type: string
    default: 'Security group'

steps:
  - task: ManualValidation@0
    displayName: 'Manual validation'
    inputs:
      instructions: 'Do you want to execute: ${{ parameters.command }}'
      emailRecipients: |
${{ parameters.groupName }}- In the job folder, create a file called manual-intervention-job.yml as the manual validation task can only run on agentless-jobs
- Inside this file, add the following content
jobs:
  - job: ManualValidation
    pool: server
    steps:
      - template: ../task/manual-intervention-task.yml
        parameters:
          groupName: ${{ parameters.groupName }}
command: ${{ parameters.command }}- Go to the azure-rbac-powershell-job.yml and just under the jobs, add the following content to conditionally check wether it is a custom or normal run
jobs:
  - ${{ if eq(parameters.runCustom, true)}}:
    - job: ManualValidation
      displayName: 'Manual validation'
      pool: server
      steps:
        - template: ../task/manual-intervention-task.yml
          parameters:
            groupName: ${{ parameters.groupName }}
command: ${{ parameters.command }}- Make sure the parameter groupName is added
- name: groupName
type: string- Lastly in this file, make sure that the dependsOn is turned on for the ManualValidation job, as you want to make sure that job has finished first
- job: Assigner_${{ parameters.environmentName }}
    displayName: 'Azure role assigner - ${{ parameters.environmentName }}'
    dependsOn:
    - ${{ if eq(parameters.runCustom, true)}}:
      - ManualValidation
Make sure that the groupName parameter is added to both the stages file also.
Now make sure that you commit back the changes. When the templates are updated, you can run a custom run, and see what the result is.
Series conclusion
Phew! That was the end of the this series. You now should have a fully auditable, traceable and secure pipeline running for your Azure role assignments, but also custom assignments. What will you do next? Are you going to add conditions on the higher environments with pull request validations? Will you add a custom list which cmdlets can run when you switch on the runCustom parameter? There are a lot more possibilities to explore!
